> ## Documentation Index
> Fetch the complete documentation index at: https://rendobar.com/docs/llms.txt
> Use this file to discover all available pages before exploring further.
> ## Agent Instructions
> Keep the API key in an env var (RENDOBAR_API_KEY), never in chat or committed code.
> Job types change, so fetch the live catalog from GET https://api.rendobar.com/jobs/types rather than relying on memory.
> The full integration prompt for coding agents is at https://rendobar.com/prompts/integrate.md.
# Connect a Cloudflare R2 bucket
> Connect a Cloudflare R2 bucket to Rendobar with an R2 API token, so that jobs can read files from it and write their outputs back to it.
Connect a Cloudflare R2 bucket so jobs can read files from it and write outputs back to it. For how connections work across providers, see [storage connections](/docs/storage).
 ## Prerequisites
You need a Cloudflare account with an R2 bucket.
R2 accepts two kinds of credential. Choose one with **Key type** in the connect dialog:
| Key type | Use when | You enter |
| ------------------------- | ------------------------------------------ | --------------------------------------------------------- |
| **API token** | You have no credentials for the bucket yet | API token, bucket name |
| **Access key and secret** | You already have an S3 key pair | Account ID, bucket name, access key ID, secret access key |
This page uses an API token. To use a key pair instead, see [Connect with an access key and secret](#connect-with-an-access-key-and-secret).
## 1. Create an R2 API token
1. In the Cloudflare dashboard, go to **R2 Object Storage** > **Manage API tokens**.
2. Select **Create Account API token**.
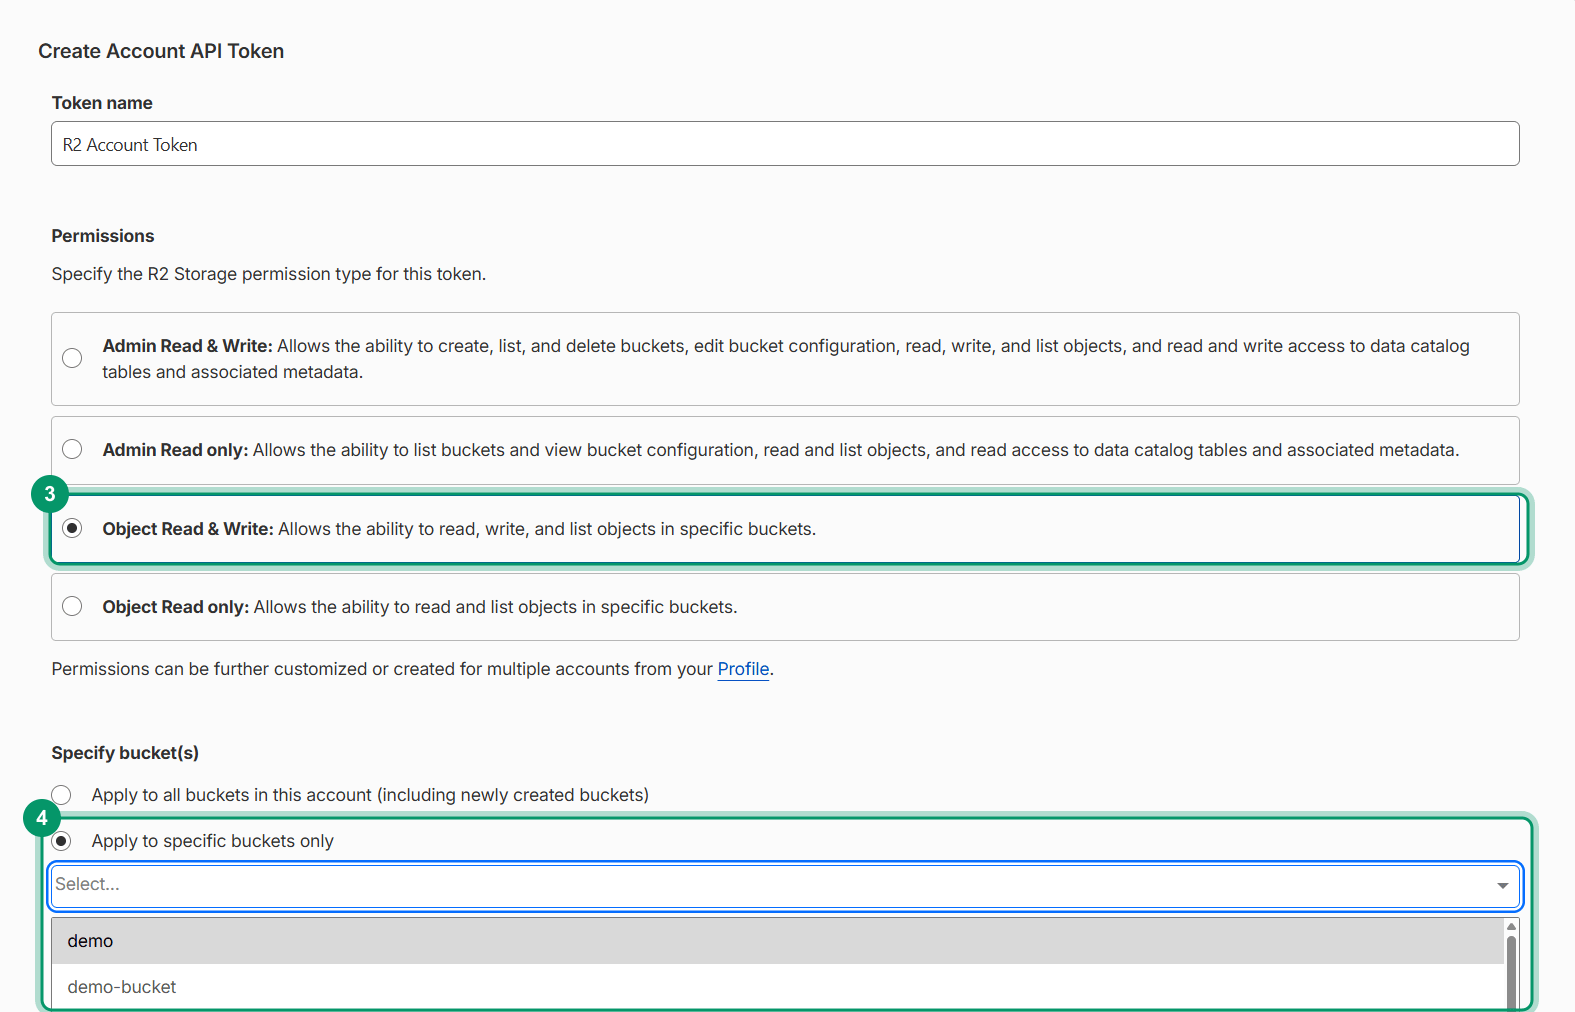
3. Under **Permissions**, select **Object Read & Write**.
4. Under **Specify bucket(s)**, select **Apply to specific buckets only**, then select your bucket.
5. Select **Create Account API Token**.
Rendobar reads, writes, lists, and deletes objects. It never creates or deletes buckets, so **Admin Read & Write** is more access than it needs.
## Prerequisites
You need a Cloudflare account with an R2 bucket.
R2 accepts two kinds of credential. Choose one with **Key type** in the connect dialog:
| Key type | Use when | You enter |
| ------------------------- | ------------------------------------------ | --------------------------------------------------------- |
| **API token** | You have no credentials for the bucket yet | API token, bucket name |
| **Access key and secret** | You already have an S3 key pair | Account ID, bucket name, access key ID, secret access key |
This page uses an API token. To use a key pair instead, see [Connect with an access key and secret](#connect-with-an-access-key-and-secret).
## 1. Create an R2 API token
1. In the Cloudflare dashboard, go to **R2 Object Storage** > **Manage API tokens**.
2. Select **Create Account API token**.
3. Under **Permissions**, select **Object Read & Write**.
4. Under **Specify bucket(s)**, select **Apply to specific buckets only**, then select your bucket.
5. Select **Create Account API Token**.
Rendobar reads, writes, lists, and deletes objects. It never creates or deletes buckets, so **Admin Read & Write** is more access than it needs.
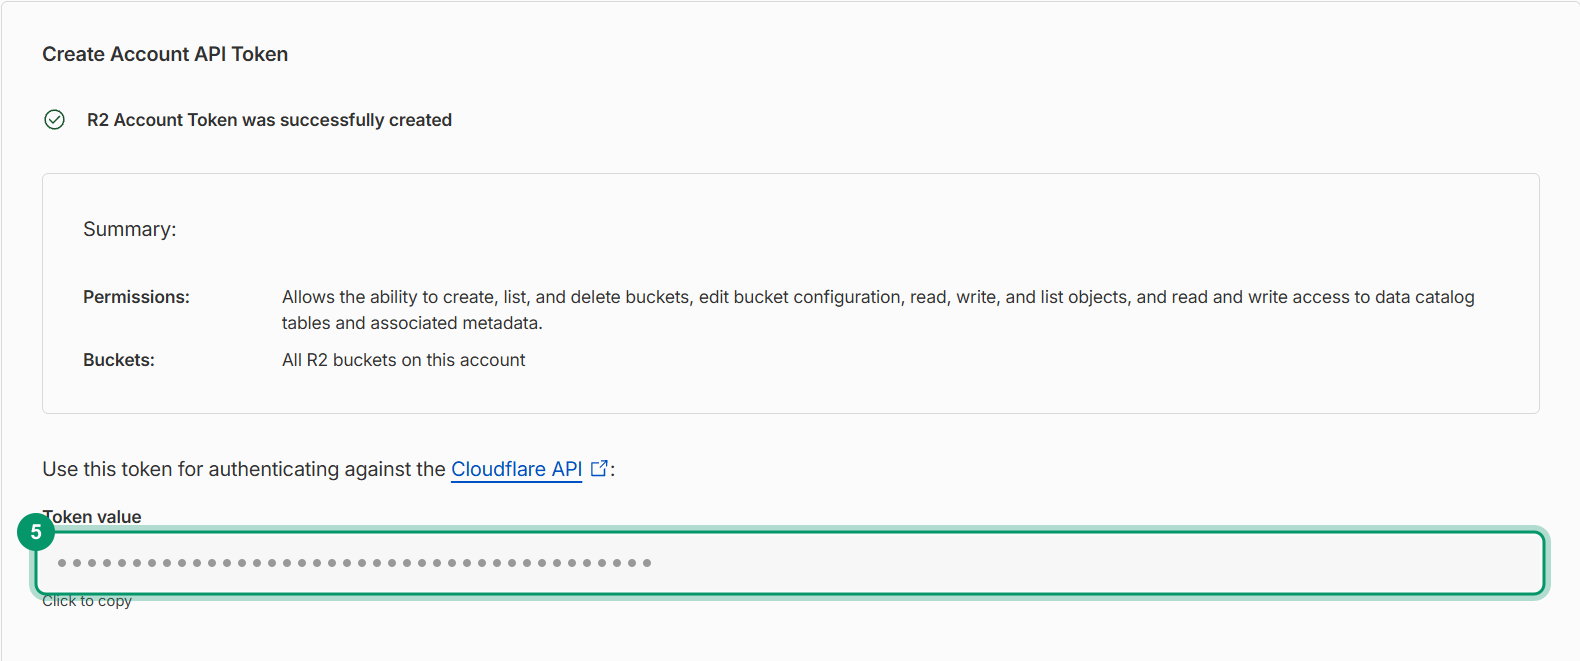
 Cloudflare shows the token only once. Copy it before you leave the page, or you will need to create a new one.
 ## 2. Connect the bucket
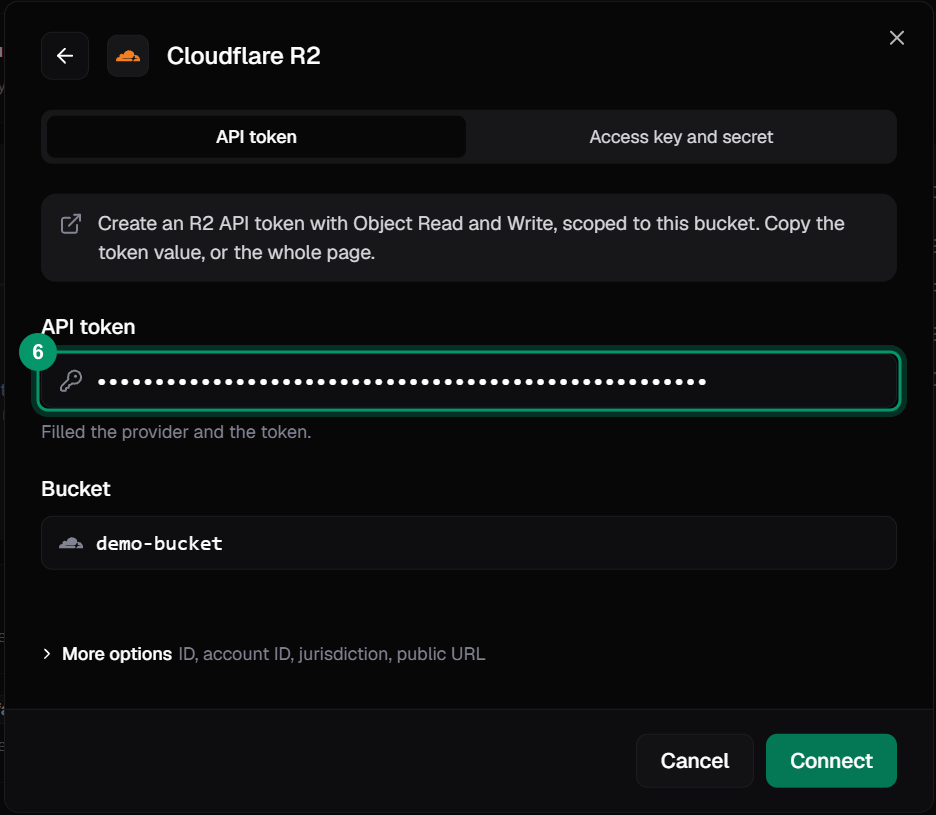
1. In [**Storage**](https://app.rendobar.com/storage), select **Connect Storage**, then **Cloudflare R2**.
2. In **API token**, paste the token. In **Bucket**, enter the bucket name.
3. (Optional) Under **More options**, change the **ID**. Jobs use it to reference the bucket.
4. Select **Connect**.
You can paste the whole Cloudflare token page into **API token**. Rendobar finds the token in the text.
## 2. Connect the bucket
1. In [**Storage**](https://app.rendobar.com/storage), select **Connect Storage**, then **Cloudflare R2**.
2. In **API token**, paste the token. In **Bucket**, enter the bucket name.
3. (Optional) Under **More options**, change the **ID**. Jobs use it to reference the bucket.
4. Select **Connect**.
You can paste the whole Cloudflare token page into **API token**. Rendobar finds the token in the text.
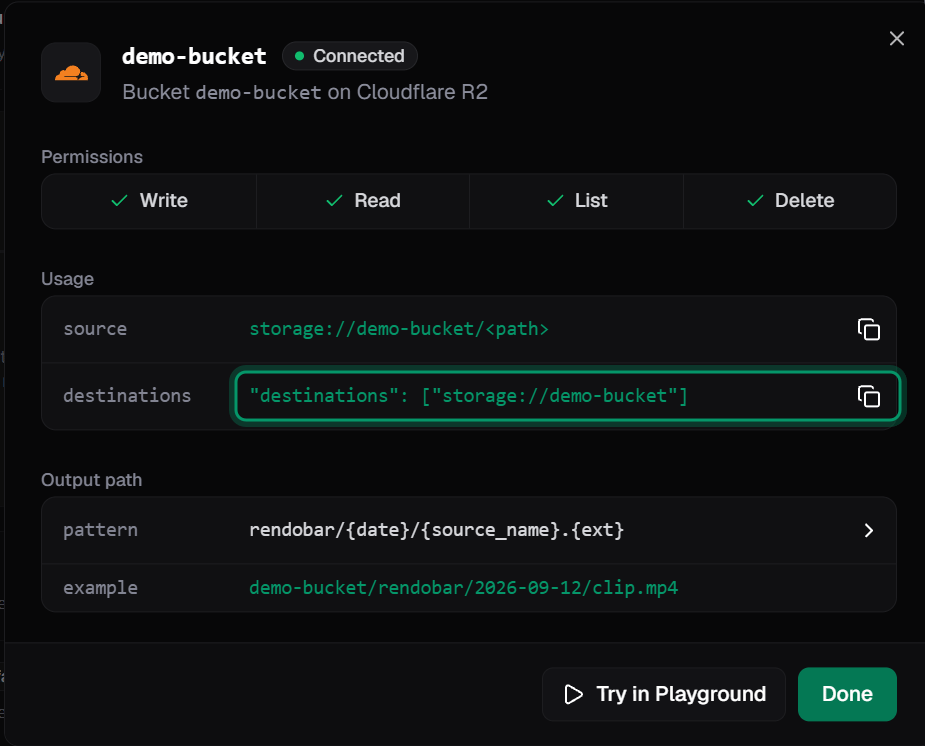
 Rendobar runs its [access checks](/docs/storage#connect-a-bucket) and saves the connection only if they pass. If the bucket does not exist, the dialog offers **Create the bucket and connect**.
 ## 3. Use the bucket in a job
Put an object in `inputs` to read it, and the connection in `destinations` to write the output:
```typescript SDK theme={null}
import { createClient, outputUrl } from "@rendobar/sdk";
const client = createClient({
apiKey: process.env.RENDOBAR_API_KEY,
});
const job = await client.jobs.run({
type: "ffmpeg",
inputs: { source: "storage://demo-bucket/raw/clip.mp4" },
params: {
command: "ffmpeg -i source -vf scale=1280:-2 out.mp4",
},
destinations: ["storage://demo-bucket/exports"],
});
console.log(outputUrl(job));
console.log(job.deliveries);
```
```bash cURL theme={null}
curl https://api.rendobar.com/jobs \
-H "Authorization: Bearer $RENDOBAR_API_KEY" \
-H "Content-Type: application/json" \
-d '{
"type": "ffmpeg",
"inputs": { "source": "storage://demo-bucket/raw/clip.mp4" },
"params": {
"command": "ffmpeg -i source -vf scale=1280:-2 out.mp4"
},
"destinations": ["storage://demo-bucket/exports"]
}'
```
With the default output path, this writes `exports/clip.mp4`. Delivery finishes after the job, so `job.deliveries` can still show `pending` when `run` returns.
To change how outputs are named, see [delivery settings](/docs/storage#delivery-settings). If a delivery fails, see [delivery errors](/docs/storage#delivery-errors).
## How do I revoke access?
1. In the Cloudflare dashboard, go to **R2 Object Storage** > [**Manage API tokens**](https://developers.cloudflare.com/r2/api/tokens/).
2. Delete the token used by the connection.
The connection stops working immediately. To replace the credential without changing job payloads, [rotate it](/docs/storage#rotate-a-credential) instead.
Deleting a bucket does not revoke its token. A token scoped to all buckets still reaches every other bucket in the account, so scope tokens to one bucket.
## Connect with an access key and secret
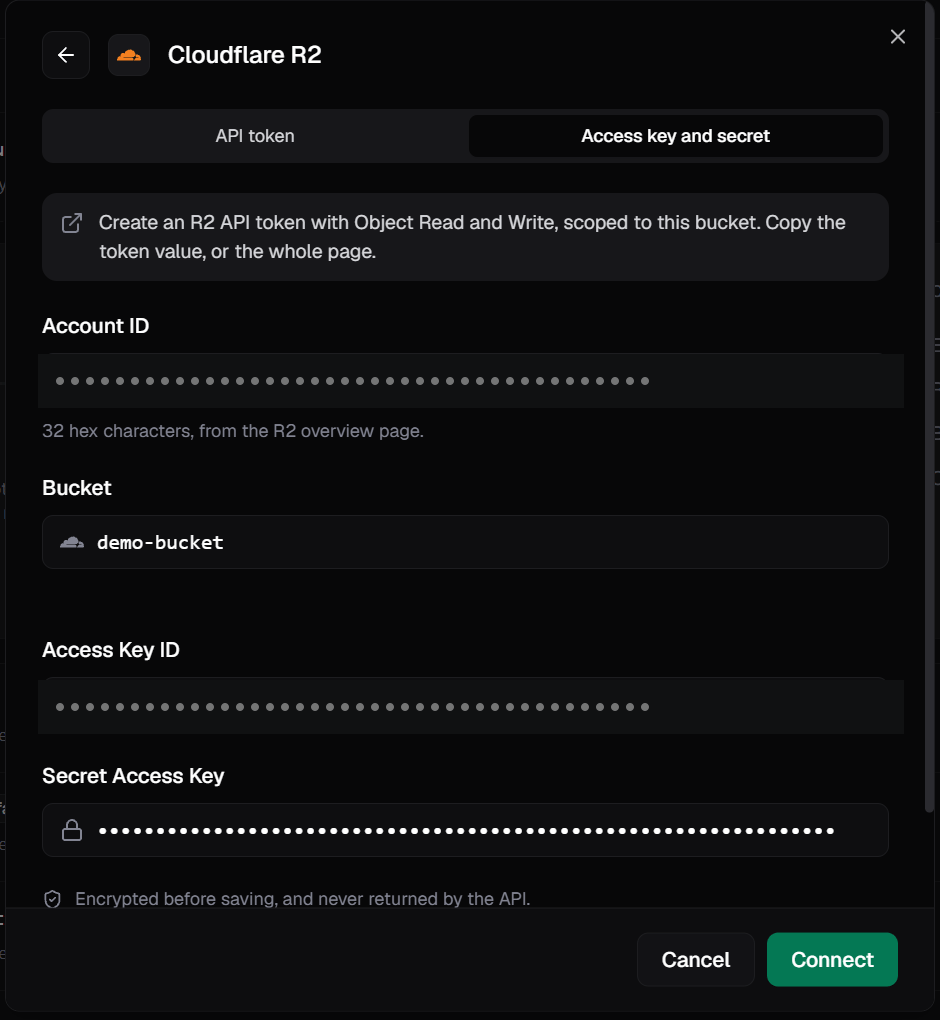
If you already have an S3 key pair for the bucket, set **Key type** to **Access key and secret**, then enter:
* **Account ID**: 32 hexadecimal characters, shown on the R2 overview page
* **Access Key ID** and **Secret Access Key**: from the key pair
Rendobar builds the endpoint from the account ID: `https://.r2.cloudflarestorage.com`.
## 3. Use the bucket in a job
Put an object in `inputs` to read it, and the connection in `destinations` to write the output:
```typescript SDK theme={null}
import { createClient, outputUrl } from "@rendobar/sdk";
const client = createClient({
apiKey: process.env.RENDOBAR_API_KEY,
});
const job = await client.jobs.run({
type: "ffmpeg",
inputs: { source: "storage://demo-bucket/raw/clip.mp4" },
params: {
command: "ffmpeg -i source -vf scale=1280:-2 out.mp4",
},
destinations: ["storage://demo-bucket/exports"],
});
console.log(outputUrl(job));
console.log(job.deliveries);
```
```bash cURL theme={null}
curl https://api.rendobar.com/jobs \
-H "Authorization: Bearer $RENDOBAR_API_KEY" \
-H "Content-Type: application/json" \
-d '{
"type": "ffmpeg",
"inputs": { "source": "storage://demo-bucket/raw/clip.mp4" },
"params": {
"command": "ffmpeg -i source -vf scale=1280:-2 out.mp4"
},
"destinations": ["storage://demo-bucket/exports"]
}'
```
With the default output path, this writes `exports/clip.mp4`. Delivery finishes after the job, so `job.deliveries` can still show `pending` when `run` returns.
To change how outputs are named, see [delivery settings](/docs/storage#delivery-settings). If a delivery fails, see [delivery errors](/docs/storage#delivery-errors).
## How do I revoke access?
1. In the Cloudflare dashboard, go to **R2 Object Storage** > [**Manage API tokens**](https://developers.cloudflare.com/r2/api/tokens/).
2. Delete the token used by the connection.
The connection stops working immediately. To replace the credential without changing job payloads, [rotate it](/docs/storage#rotate-a-credential) instead.
Deleting a bucket does not revoke its token. A token scoped to all buckets still reaches every other bucket in the account, so scope tokens to one bucket.
## Connect with an access key and secret
If you already have an S3 key pair for the bucket, set **Key type** to **Access key and secret**, then enter:
* **Account ID**: 32 hexadecimal characters, shown on the R2 overview page
* **Access Key ID** and **Secret Access Key**: from the key pair
Rendobar builds the endpoint from the account ID: `https://.r2.cloudflarestorage.com`.
 ## R2-specific behavior
**Jurisdictions.** Buckets in the EU or FedRAMP jurisdiction use a different endpoint. Set the jurisdiction under **More options** when you connect.
**Public URLs.** Use the bucket's [r2.dev domain or a custom domain](https://developers.cloudflare.com/r2/buckets/public-buckets/) as the connection's [public URL](/docs/storage#public-url).
**Egress.** R2 does not charge for egress. See [R2 pricing](https://developers.cloudflare.com/r2/pricing/), and [running FFmpeg on files in R2](https://rendobar.com/ffmpeg/r2/) for how that compares with S3.
## Next steps
Connection ids, delivery settings, credentials, and error codes.
Where `inputs` and `destinations` appear in the job payload.
Submit the job above in TypeScript.
Receive an event when a job completes.
## R2-specific behavior
**Jurisdictions.** Buckets in the EU or FedRAMP jurisdiction use a different endpoint. Set the jurisdiction under **More options** when you connect.
**Public URLs.** Use the bucket's [r2.dev domain or a custom domain](https://developers.cloudflare.com/r2/buckets/public-buckets/) as the connection's [public URL](/docs/storage#public-url).
**Egress.** R2 does not charge for egress. See [R2 pricing](https://developers.cloudflare.com/r2/pricing/), and [running FFmpeg on files in R2](https://rendobar.com/ffmpeg/r2/) for how that compares with S3.
## Next steps
Connection ids, delivery settings, credentials, and error codes.
Where `inputs` and `destinations` appear in the job payload.
Submit the job above in TypeScript.
Receive an event when a job completes.